Getting started: from payment to your first order
Pay for your plan, sign in, and follow the setup checklist. Most restaurants finish in under an hour.
1. Choose your plan and pay
On callonia.ai, pick your plan and choose “with a Callonia tablet” or “I have my own tablet”. The plan is a monthly subscription you can cancel any time.
As soon as the payment goes through, your restaurant is created and we email you an invitation.
2. Sign in
- Open the invitation, or go to app.callonia.ai and sign in with the same email you paid with (email and password, Google, Microsoft or Apple).
- Owners turn on 2-step verification the first time: scan the code with an authenticator app (Google Authenticator, Microsoft Authenticator, 1Password…) and type the 6-digit code.
3. Follow the setup checklist
Open Setup checklist. A green check means the step is done; Start or Edit takes you to the page.
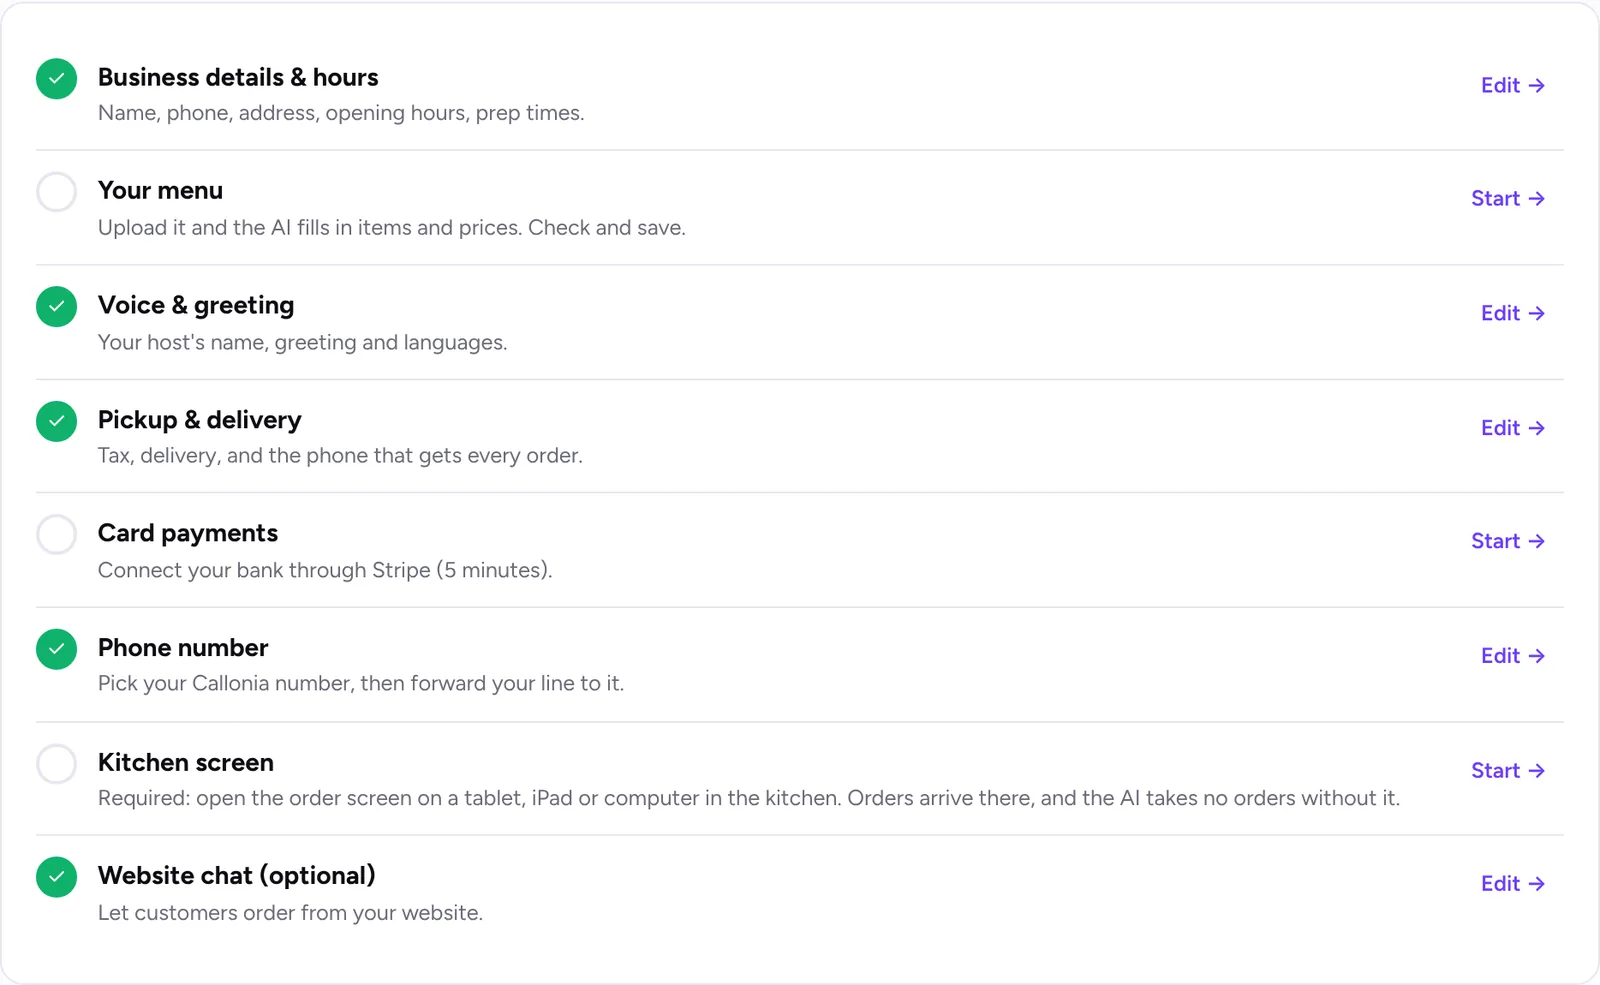
- Business details & hours: name, phone, address, hours and prep times.
- Your menu: upload a photo or PDF, check the items and prices, and save.
- Voice & greeting: your host’s name, greeting and languages.
- Pickup & delivery: tax, delivery and the phone that gets every order.
- Card payments: connect your bank through Stripe (about 5 minutes).
- Phone number: pick your Callonia number and forward your line to it.
- Kitchen screen: connect the tablet. The AI takes no orders until a kitchen screen is connected.
- Website chat (optional) and Text messages: let customers order from your website and get order texts.
4. Test it
Call your Callonia number and order like a customer. The order appears on the kitchen screen with a sound. Then go live by forwarding your restaurant line (see “Forward your restaurant line to Callonia”).
Still stuck? Write to [email protected] with your restaurant name and we’ll get back to you.